
Video content has become increasingly popular across various platforms. Whether you’re a content creator, a marketer, or simply someone who enjoys making videos, adding subtitles and closed captions to your videos can greatly enhance their accessibility and reach. CapCut, a free online video editor, offers a user-friendly interface and powerful features that make it easy to add subtitles and closed captions to your videos. In this article, we will provide you with a step-by-step guide on how to add subtitles and closed captions using CapCut.
Attributes of CapCut’s Subtitles and Closed Captions to Videos
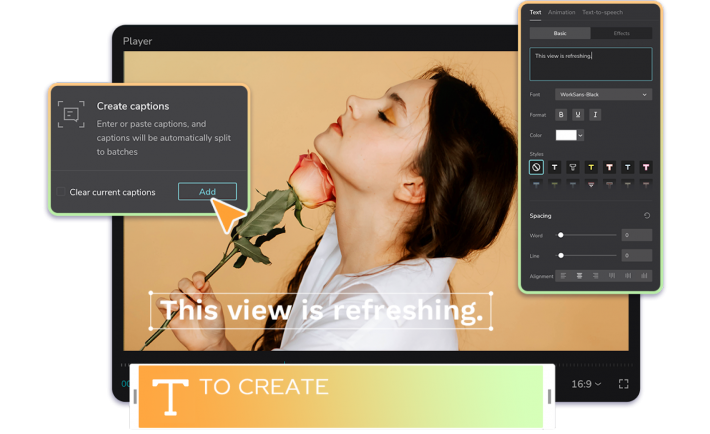
Source: CapCut
- Accuracy: CapCut’s subtitles and closed captions strive to be highly accurate, faithfully representing the spoken content of the video. This ensures that viewers can rely on the captions to understand the dialogue and any other essential audio elements.
- Synchronization: The subtitles and closed captions in CapCut are meticulously synchronized with the corresponding audio. They appear on the screen at the appropriate time, aligning with the speaker’s dialogue or relevant sounds, thus enabling a seamless viewing experience.
- Readability: CapCut’s subtitles and closed captions prioritize readability. They employ clear and legible fonts, appropriate text size, and suitable color contrast against the background. This ensures that viewers can easily read the captions without straining their eyes.
- Formatting: To aid comprehension, CapCut’s subtitles and closed captions utilize formatting features such as line breaks, speaker labels, and text positioning. Line breaks are strategically placed to prevent overcrowding and allow for smooth readability. Speaker labels help identify different speakers during conversations, enhancing clarity.
- Customization: CapCut offers customization options for subtitles and closed captions. Users can personalize their appearance by choosing different font styles, sizes, colors, and backgrounds. This flexibility allows creators to match the captions with the overall visual aesthetic of their videos.
- Multilingual Support: CapCut supports multiple languages, enabling the creation of subtitles and closed captions in various languages. This feature broadens the accessibility of videos, facilitating global viewership and inclusivity.
- Accessibility: CapCut’s subtitles and closed captions prioritize accessibility for individuals with hearing impairments. Providing accurate captions makes video content accessible to a wider audience, promoting equal participation and understanding.
- Ease of Use: CapCut simplifies the process of adding subtitles and closed captions to videos. The intuitive interface and user-friendly controls allow creators to seamlessly create, edit, and manage captions, enhancing productivity and saving time.
- Real-Time Preview: CapCut offers a real-time preview feature, enabling creators to visualize how the subtitles or closed captions will appear while editing. This instant feedback facilitates precise timing and synchronization, resulting in a polished and professional captioning experience.
- Export and Sharing: Once created, CapCut allows users to export videos with embedded subtitles or closed captions. This feature empowers creators to share their content across different platforms while ensuring that captions remain intact, facilitating accessibility for viewers.
Step-by-Step Guide for Adding Subtitles and Closed Captions
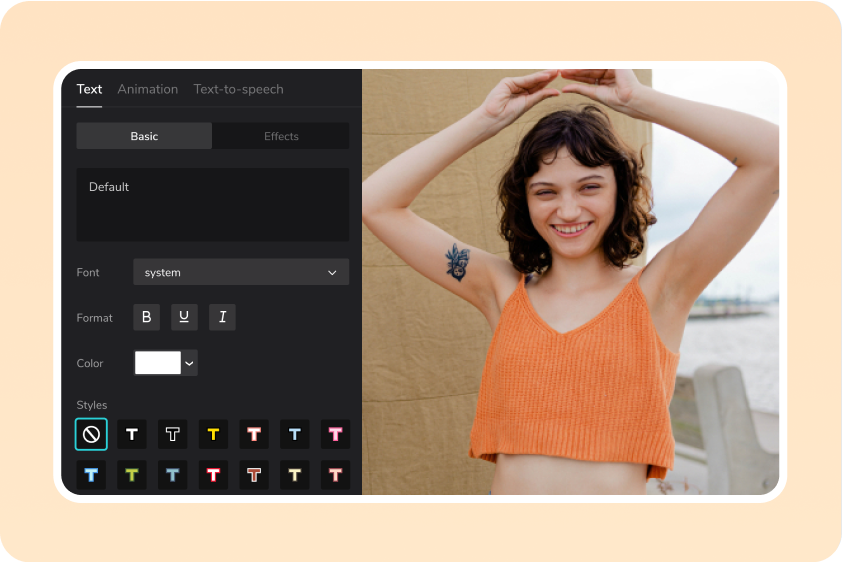
Source: CapCut
Step 1: Upload Your Video
Tap on the “Upload” button or the drag-and-drop option in CapCut to upload the video you want to add subtitles to.
Step 2: Add Subtitles
To add subtitles to your video, tap on the “Text” option located in the toolbar at the bottom of the screen. This will open a text editing panel where you can enter the desired text for your subtitles. Choose a font style, size, and color that best suits your video’s theme and readability.
Step 3: Adjust Subtitle Placement and Duration
With the text added, you can now adjust the placement of the subtitles on the video. Tap and hold the text box, then drag it to the desired position on the screen. You can also resize the text box by dragging the corners. To adjust the duration of the subtitle, tap on the text box and select the “Duration” option. Set the start and end time for the subtitle to appear and disappear in your video.
Step 4: Customize Subtitle Appearance
CapCut provides various customization options to make your subtitles visually appealing. Using the video background remover, you can add a background color or blur effect to the subtitles to make them stand out. Additionally, you can adjust the transparency, shadow, and outline settings for better readability. Experiment with different styles to find the one that suits your video best.
Step 5: Add Closed Captions
To add closed captions, which include not only the dialogue but also descriptions of sound effects and other audio cues, you can follow a similar process as adding subtitles. Tap on the “Text” option again, but this time enter the closed captions text that corresponds to the audio elements in your video. Adjust the placement, duration, and appearance of the closed captions just like you did with the subtitles.
Step 6: Preview and Fine-Tune
After adding subtitles and closed captions, it’s essential to preview your video to ensure they are accurately synchronized and appear as intended. Tap on the “Play” button to review your video and make any necessary adjustments. If you need to edit or modify any of the subtitles or closed captions, simply tap on the text box to access the editing panel.
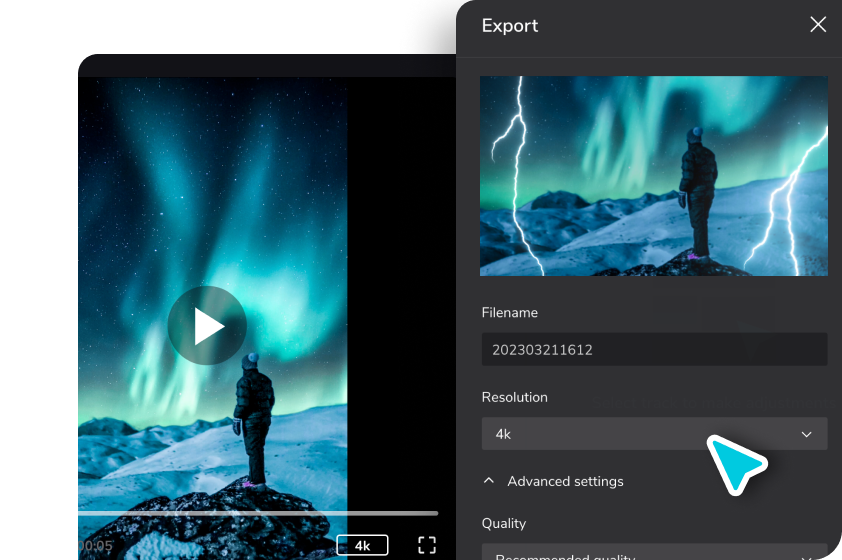
Step 7: Export and Share
Once you are satisfied with the subtitles and closed captions, it’s time to export your video. Tap on the “Export” button located in the upper right corner of the screen. CapCut offers various export options, including different video resolutions and formats. Select the desired settings and tap on “Export” to generate the final video. Once the export is complete, you can share your video directly to social media platforms or save it to your device’s gallery.
Conclusion
Adding subtitles and closed captions to your videos using CapCut is a straightforward process that greatly enhances the accessibility and inclusivity of your content. With its user-friendly interface and powerful editing capabilities, CapCut allows you to create professional-looking videos with well-timed subtitles and closed captions. By following the step-by-step guide outlined in this article, you can easily make your videos more engaging and accessible to a wider audience. So, go ahead and unleash your creativity while ensuring that your content reaches as many viewers as possible.